Working with Basic tools in Windows Phone App
In our way learning some basic tools in any platform will give you confidence to learn the platform completely yourself.So we always ask people stick to basic things in any platform.So here we discussed basic tools like TextBlock, TextBox and Button.
Working with TextBlock:
TextBlock is nothing but the label.The main thing you have to remember about Textblock is that content of TextBlock can't be changed by user.To understand what is TextBlock here we provided a good example.
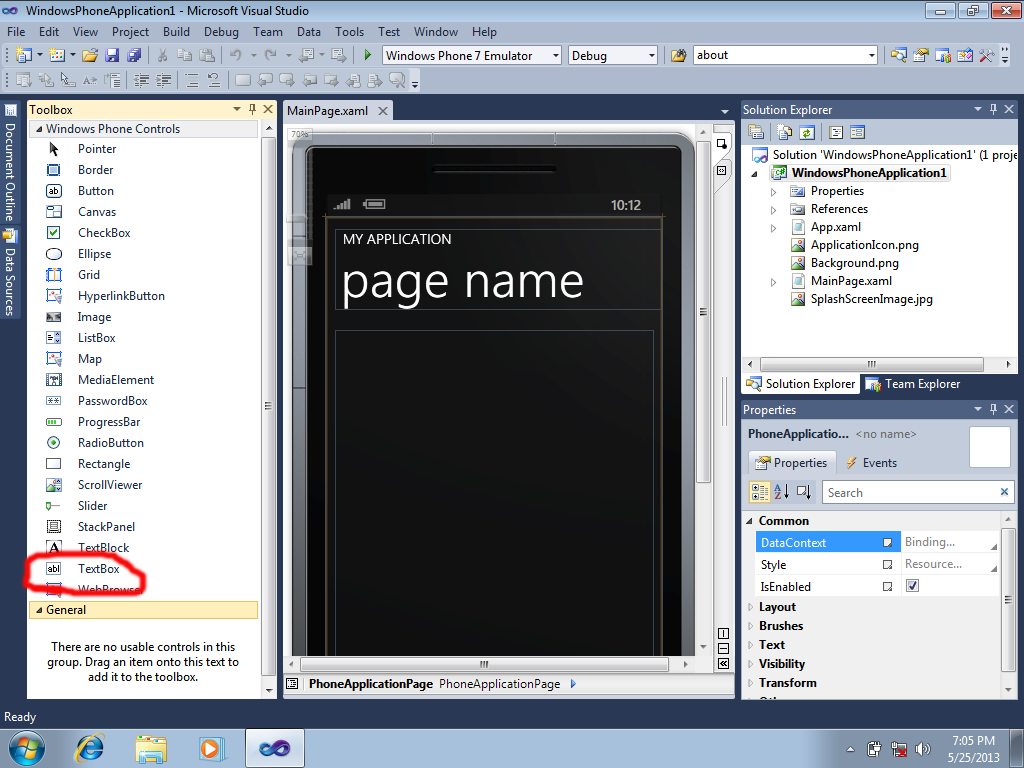
To add TextBlock into your application click on Toolbox in right side and just drag and drop TextBlock into your phone design.
You can also add TextBlock through XAML code
<TextBlock Height="30" HorizontalAlignment="Left" Margin="145,54,0,0" Name="textBlock1" Text="TextBlock" VerticalAlignment="Top" />
Working with TextBox:
As you seen in the above image TextBox are generally fields where user will enter their inputs.E.g the box where you enter your mail id in gmail login page is the textbox.
To add TextBox also just click on ToolBox in right side and just drag and drop TextBox into your phone design.
You can also add TextBox through XAML code directly as
<TextBox Height="72" HorizontalAlignment="Left" Margin="12,116,0,0" Name="textBox1" Text="TextBox" VerticalAlignment="Top" Width="460" />
Working with Buttons:
Buttons are very important user interface components since most events in phone or PC are handled by button clicks.So learning about buttons is more important thing in Windows Phone App.
As usual to add any design component like TextBox,TextBlock or Button in present case All we need to do is just to click on ToolBox and drag and drop the reuired item into the design page.
But drag and dropping components is not a good practice.We should learn working with XAML also but In this stage of development just prefer Drag and Drop .
As already said the natural way to create Button is to add the following code directly
<Button Content="Button" Height="72" HorizontalAlignment="Left" Margin="101,286,0,0" Name="button1" VerticalAlignment="Top" Width="160" />
we will discuss about how to handle events in the coming post.In this we just concentrated only on how to add TextBox,TextBlock and Button into our design. We provided the complete code of what we discussed above for your reference.
<phone:PhoneApplicationPage
x:Class="WindowsPhoneApplication1.MainPage"
xmlns="http://schemas.microsoft.com/winfx/2006/xaml/presentation"
xmlns:x="http://schemas.microsoft.com/winfx/2006/xaml"
xmlns:phone="clr-namespace:Microsoft.Phone.Controls;assembly=Microsoft.Phone"
xmlns:shell="clr-namespace:Microsoft.Phone.Shell;assembly=Microsoft.Phone"
xmlns:d="http://schemas.microsoft.com/expression/blend/2008"
xmlns:mc="http://schemas.openxmlformats.org/markup-compatibility/2006"
mc:Ignorable="d" d:DesignWidth="480" d:DesignHeight="768"
FontFamily="{StaticResource PhoneFontFamilyNormal}"
FontSize="{StaticResource PhoneFontSizeNormal}"
Foreground="{StaticResource PhoneForegroundBrush}"
SupportedOrientations="Portrait" Orientation="Portrait"
shell:SystemTray.IsVisible="True">
<!--LayoutRoot is the root grid where all page content is placed-->
<Grid x:Name="LayoutRoot" Background="Transparent">
<Grid.RowDefinitions>
<RowDefinition Height="Auto"/>
<RowDefinition Height="*"/>
</Grid.RowDefinitions>
<!--TitlePanel contains the name of the application and page title-->
<StackPanel x:Name="TitlePanel" Grid.Row="0" Margin="12,17,0,28">
<TextBlock x:Name="ApplicationTitle" Text="MY APPLICATION" Style="{StaticResource PhoneTextNormalStyle}"/>
<TextBlock x:Name="PageTitle" Text="page name" Margin="9,-7,0,0" Style="{StaticResource PhoneTextTitle1Style}"/>
</StackPanel>
<!--ContentPanel - place additional content here-->
<Grid x:Name="ContentPanel" Grid.Row="1" Margin="12,0,12,0">
<TextBox Height="72" HorizontalAlignment="Left" Margin="12,116,0,0" Name="textBox1" Text="TextBox" VerticalAlignment="Top" Width="460" />
<Button Content="Button" Height="72" HorizontalAlignment="Left" Margin="101,286,0,0" Name="button1" VerticalAlignment="Top" Width="160" />
<TextBlock Height="30" HorizontalAlignment="Left" Margin="145,54,0,0" Name="textBlock1" Text="TextBlock" VerticalAlignment="Top" />
</Grid>
</Grid>
<!--Sample code showing usage of ApplicationBar-->
<!--<phone:PhoneApplicationPage.ApplicationBar>
<shell:ApplicationBar IsVisible="True" IsMenuEnabled="True">
<shell:ApplicationBarIconButton IconUri="/Images/appbar_button1.png" Text="Button 1"/>
<shell:ApplicationBarIconButton IconUri="/Images/appbar_button2.png" Text="Button 2"/>
<shell:ApplicationBar.MenuItems>
<shell:ApplicationBarMenuItem Text="MenuItem 1"/>
<shell:ApplicationBarMenuItem Text="MenuItem 2"/>
</shell:ApplicationBar.MenuItems>
</shell:ApplicationBar>
</phone:PhoneApplicationPage.ApplicationBar>-->
</phone:PhoneApplicationPage>
Let us discuss about images and creating events for button clicks in upcoming post.


